How to Add Lesson Times
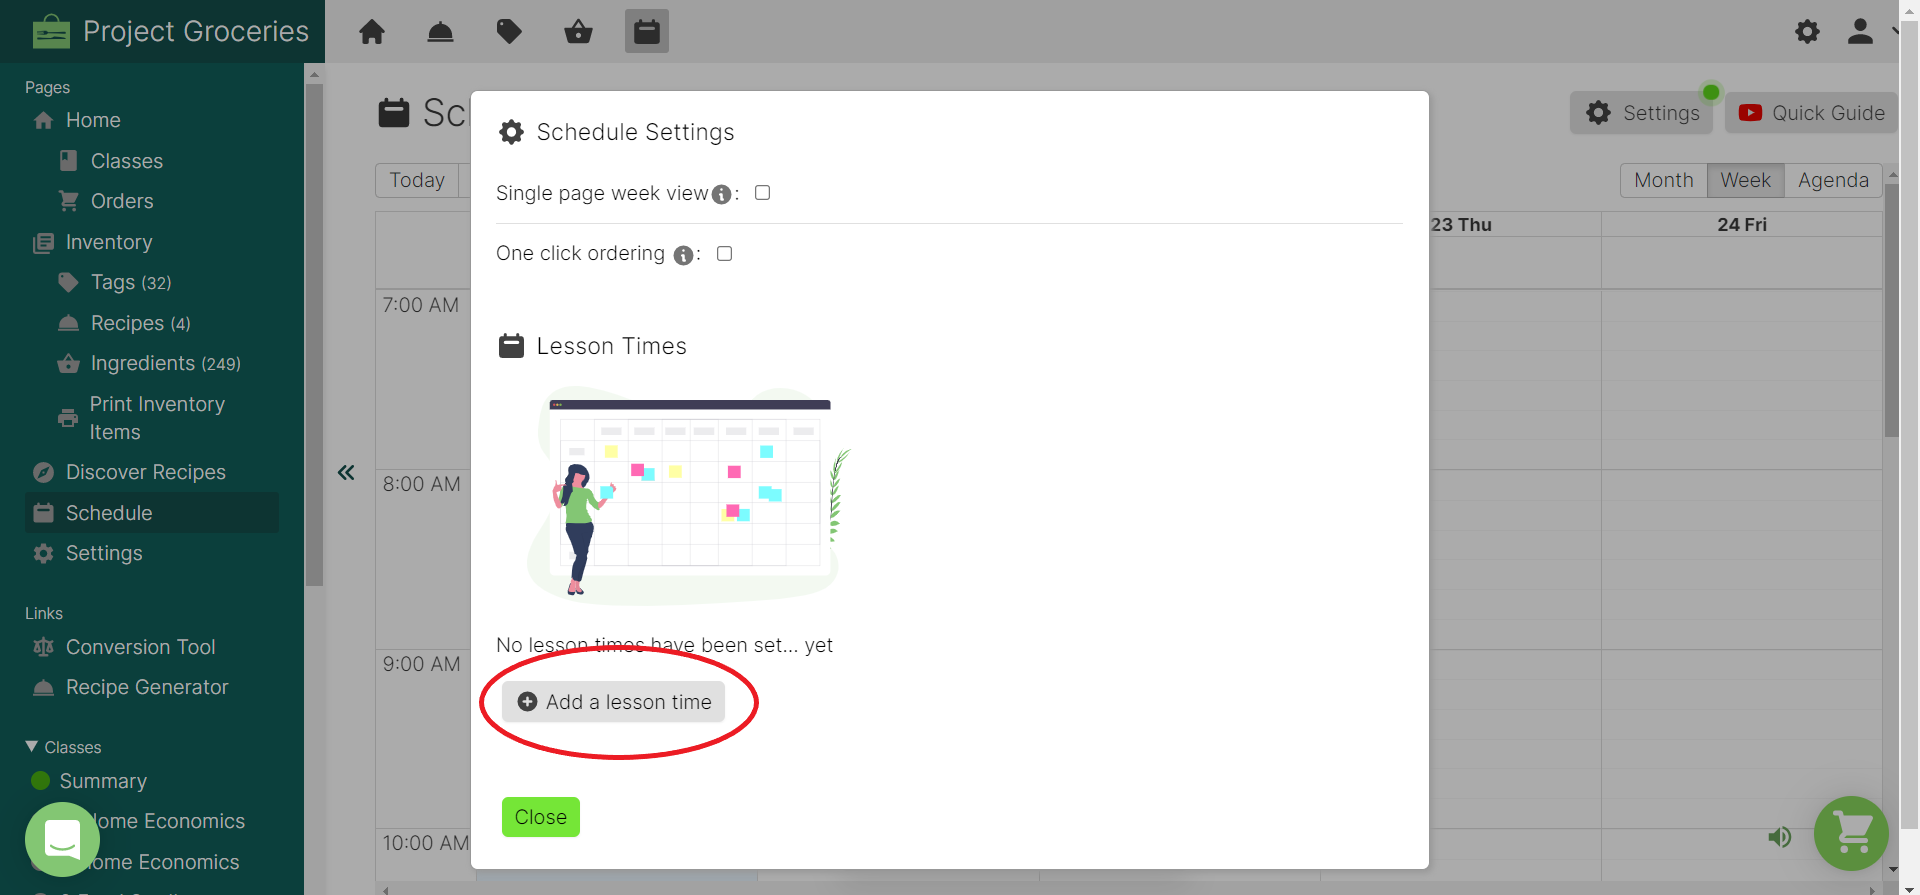
1. On the Schedule Page, navigate to and select the 'Settings' button, as shown below.

Pictured: Schedule Page with only Term Dates[1] set up. The 'Settings' button is circled in red.
2. This will open up the Settings Menu. Find the "Lesson Times" section and navigate to the "Add a lesson time" button toward the bottom of the window.
3. Select the "Add a lesson time" button. This will reveal a menu in which you will need to enter in the:
- Lesson Name
- Choose whether you are adding 'Lesson' or 'Break'
- Start Time
- End Time

4. Enter the details and make the appropriate selections.
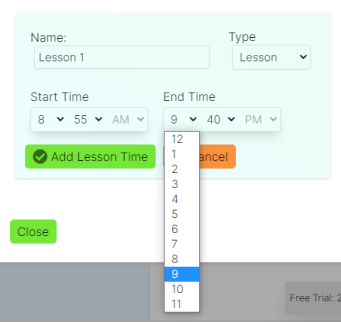
5. When all of the Lesson details have been accurately entered, select the "Add Lesson Time" button.
6. You should now be able to see that the Lesson Time has been added to your Schedule. This is indicated by the name of the Lesson Time in the left-most column, and light blue covering part of the Schedule showing the start and end times.

If you are still setting up the Schedule, repeat this for all Lesson Times and the Settings Menu and Schedule Page should look similar to the below images respectively.
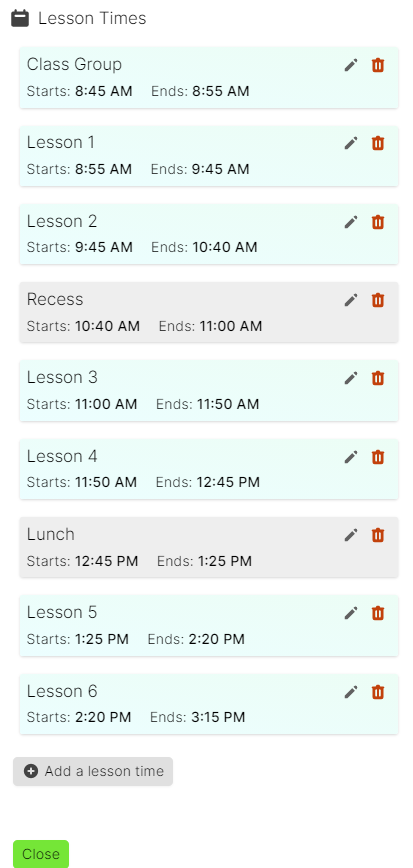
Pictured: Settings Menu on the Schedule Page with all Lesson Times and Break Times added.
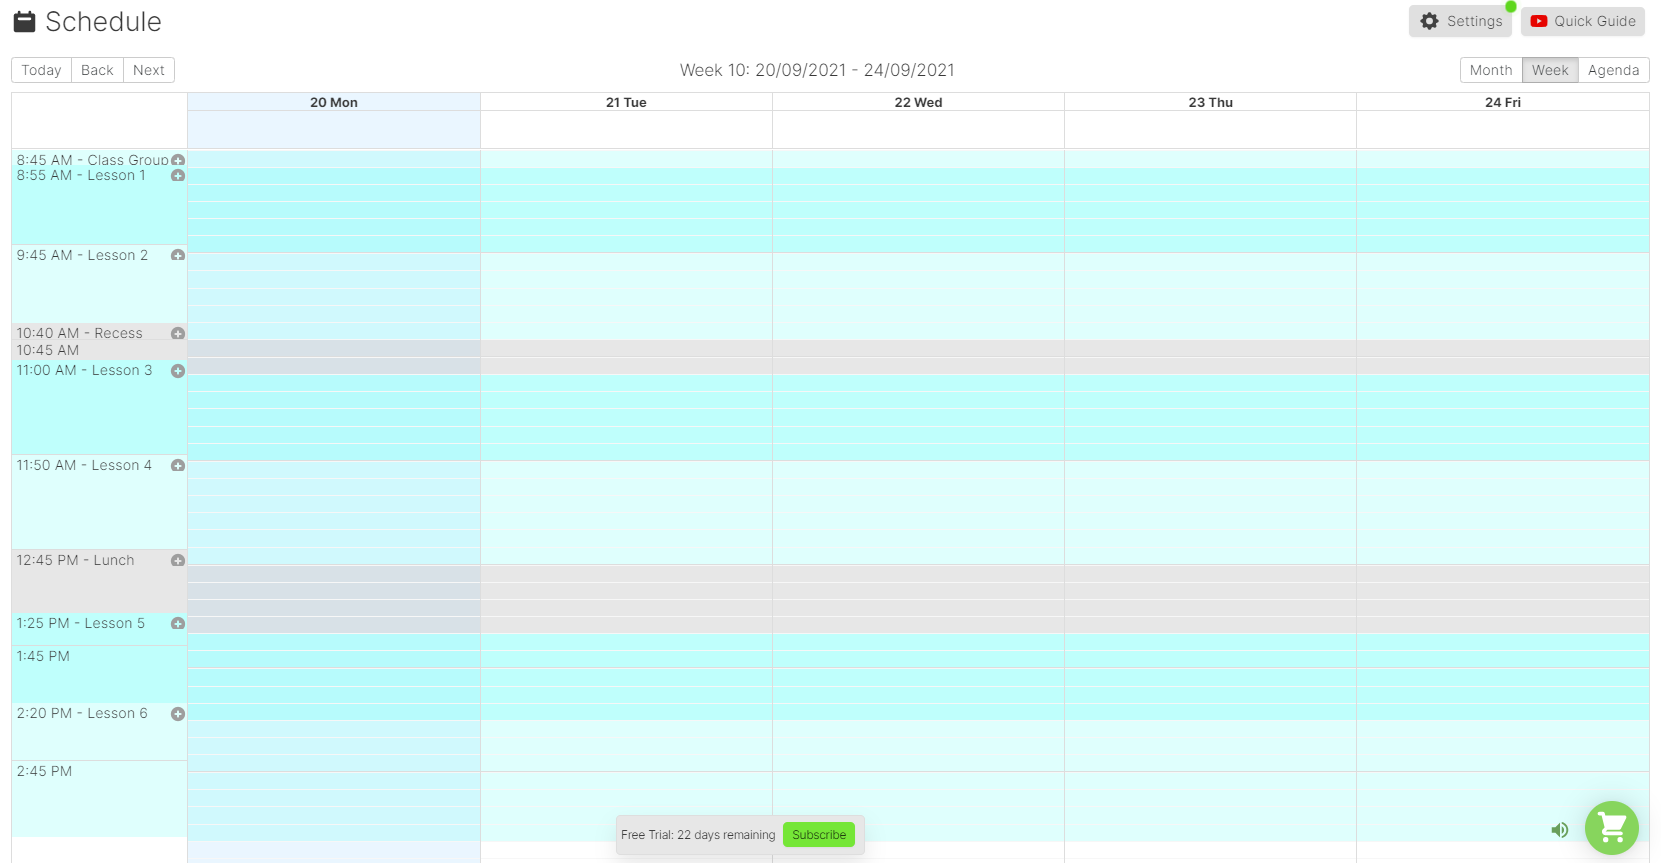
Pictured: The Schedule Page with all Lesson and Break Times added.
See How to Edit or Delete Lesson Times for more information about Lesson Times.
Appendix
[1] - How to Add Term Dates