How to Edit or Delete Term Dates
1. On the Settings Page, navigate to the "Term Dates" section. This can be found as "Terms" in the heading bar.

2. Find the Term that you want to edit and hover over it, a 'pencil'/edit button and orange 'bin'/delete button should appear.

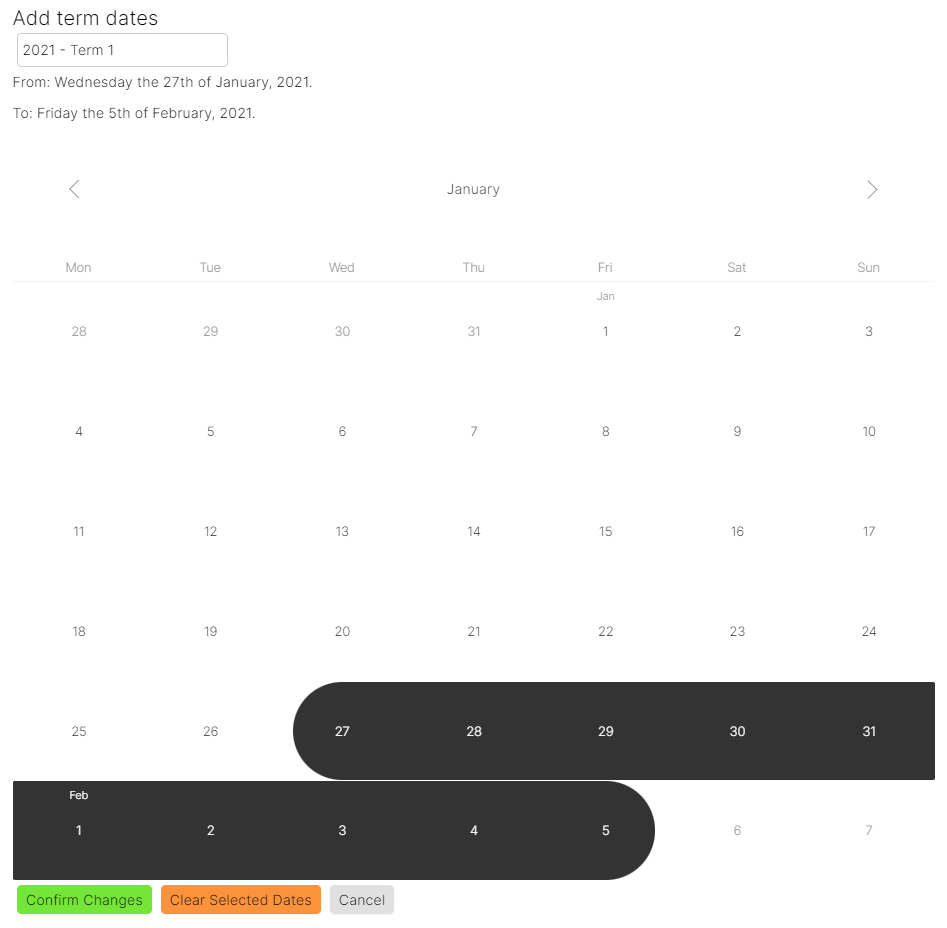
Example: The end date for "2021 - Term 1" is wrong and needs to be edited to correct it.
3. Select the edit button and the Term calendar menu will have opened up.
Editing the Term Name
1. Find the Term name at the top of the menu.
2. Highlight the text with your cursor and either delete the text or write over it with the new Term name.

Editing Term Dates
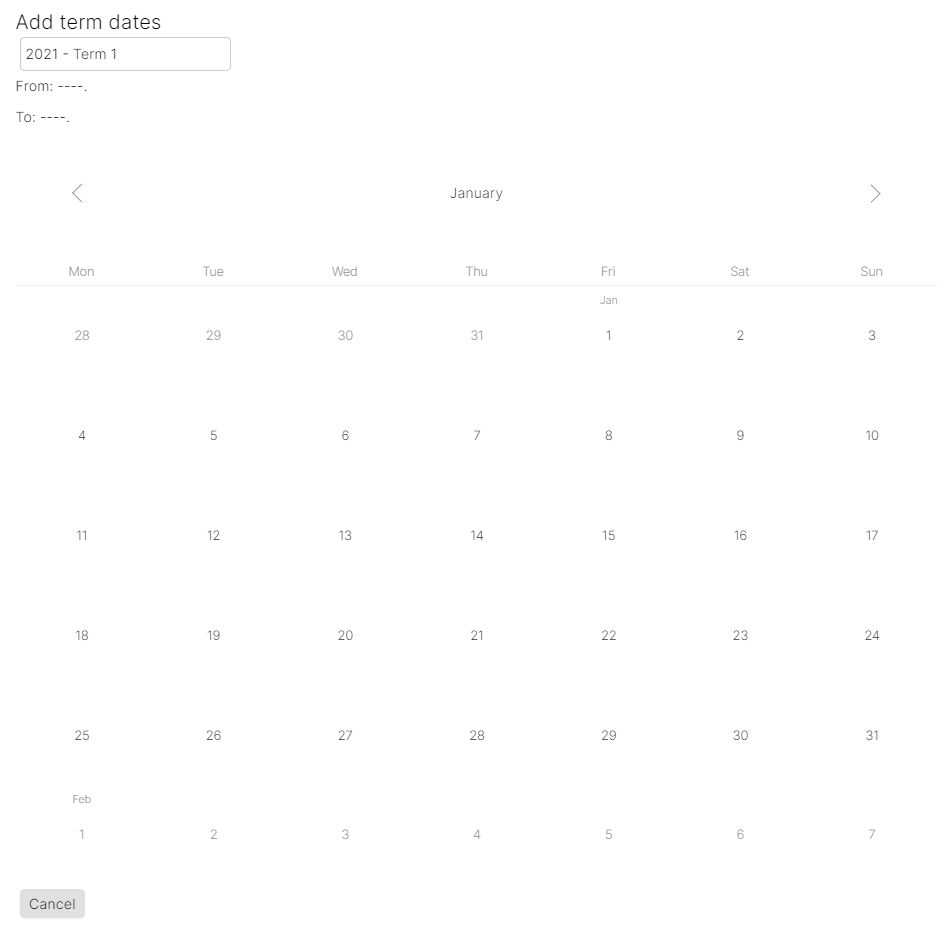
1. Find the orange "Clear Selected Dates" button at the bottom of the menu and select it. This will clear the current dates and allow you to reselect them.
2. Using the arrow buttons to either side of the month, toggle through the months and select the correct start and end dates. It is important that you select the start date before the end date because once a date is selected, you will only be able to select a future date for the following.
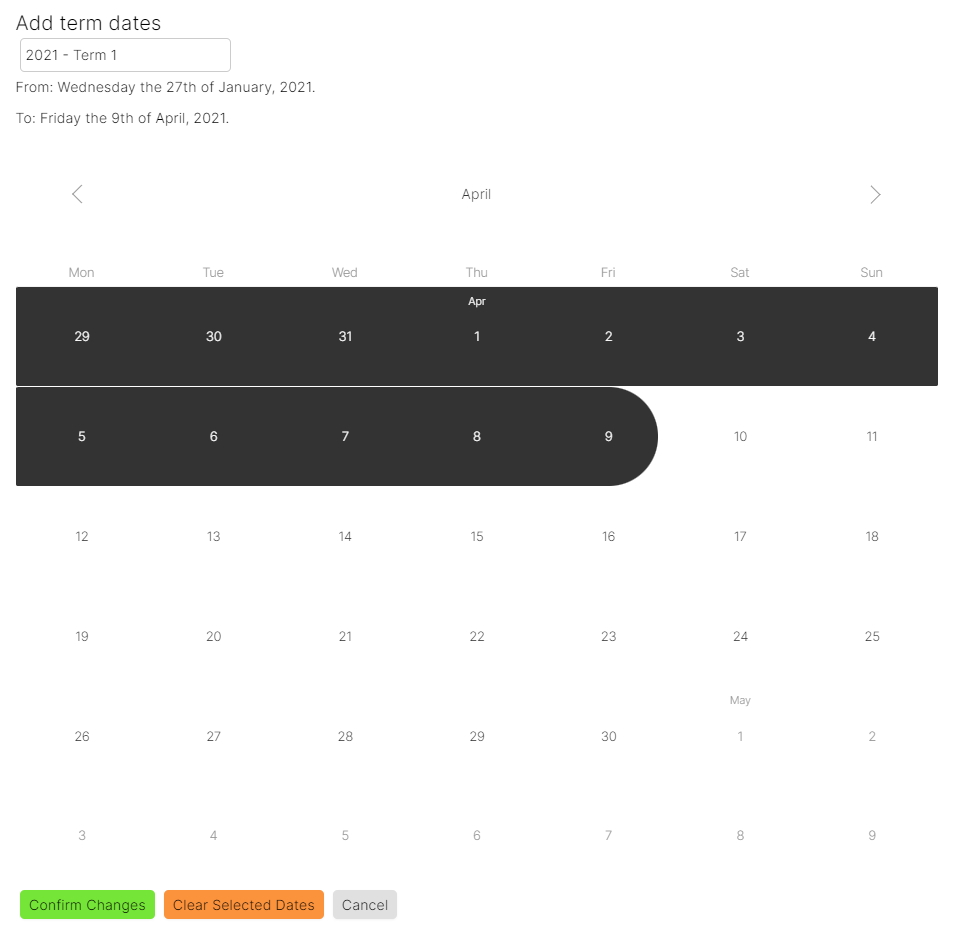
3. Once you have selected the correct start and end dates, find the green "Confirm Changes" button at the bottom of the menu and select it to save the chosen dates.

You should now see that the new Term Dates have been applied.
Deleting a Term
1. Find the Term you want to delete and hover over it with your cursor.
2. You should be able to see a 'pencil'/edit button and 'bin'/delete button appear.
3. Select the orange 'bin'/delete button to delete the Term.
Warning: deleted Term Dates cannot be recovered and will have to be recreated if needed[1].

You should now see that the Term Date is no longer on the page, meaning that it has been deleted.
You can also see this video on Setting Term Dates
View the following article to find out more about your Schedule
Appendix
[1] - How to Add Term Dates